How to Store Dinnerware in Small Cabinets Without Chipping

How to store dinnerware in small cabinets without chipping starts with shorter stacks: small cabinets punish careless stacking — plates lean, bowls nest too tightly, and every time you pull one piece out, another one scrapes against it. Chipping is rarely caused by one dramatic drop; it is usually caused by dozens of small knocks, slides, and overloaded stacks repeated every day. The fix is not a bigger kitchen — it is shorter stacks, a little separation between pieces, and a layout where the pieces you use most are the easiest to reach without disturbing the rest.
The short answer: how to store dinnerware in small cabinets without chipping
Keep stacks short, separate pieces that would otherwise rub rim to rim, and put everyday pieces where you can lift them straight out. Use shelf risers or simple dividers to split a tall cabinet space into two usable layers, keep heavy pieces low, and never force a stack into a cabinet that is already full. Most chipping disappears once pieces stop sliding against each other during everyday use.
Measure first, then lay out one small cabinet
Measure the cabinet before you move a single plate. Measure the clear height between shelves, the depth from the front edge to the back wall, and the width of the door opening, not just the shelf. The door opening decides what can get in, the depth decides what can stand upright, and the clear height decides what can be stacked or placed on a riser. Write down the smallest number for each measurement, because the smallest shelf or the narrowest opening sets the limit for the whole cabinet.
Here is a worked layout for one small cabinet with two shelves, each about 14 inches of clear height and 12 inches deep. On the lower shelf, put dinner plates flat in short stacks of four to six, heaviest pieces at the bottom, with a thin separator between pieces if the glaze is textured. Put a stable riser beside, not on top of, those stacks, and use it for side plates, so the second layer does not press down on the plates below. On the upper shelf, nest bowls by size, largest at the bottom, and store plates that are used less often upright in a divider, so one plate can be pulled out without lifting a whole stack. Nothing in this layout sits above the height you can lift with one hand, and nothing is wedged against the door.
| Cabinet type | Best method | Chip risk | Access trade-off |
|---|---|---|---|
| Shallow shelf | Short flat stacks, one size per stack | Low, if stacks stay short and separators are used | Easy to reach, but fewer pieces fit per shelf |
| Deep cabinet | Vertical plate divider at the front, bowls nested at the back | Low, because plates are lifted out, not dragged | Back items are harder to reach, so keep everyday pieces at the front |
| Drawer | Plates flat in a single layer, or upright in a drawer divider | Low, if pieces cannot slide when the drawer closes | Excellent access, but only if the drawer is deep enough for the plate diameter |
| Corner cabinet | Short stacks near the opening, rarely used pieces at the back | Higher, because pieces are hard to see and easy to knock | Slowest access, so do not store everyday plates here if another cabinet is free |
Use a stack-height rule based on material and weight. Keep heavy stoneware stacks shorter than light everyday plate stacks, and never build a stack so tall that you cannot lift the top piece down with one hand while the shelf above limits your grip. The four habits that chip the most dinnerware are tall mixed stacks, an unglazed foot resting directly on the glaze below it, overcrowding that wedges pieces against the door or the shelf above, and pulling the bottom plate out from under a tall stack. Lift the whole stack down, take the piece you need, and put the stack back, instead of dragging one plate out from the middle.
For stuck nested bowls, do not force them apart and do not pry them with a knife, because both actions chip rims. Set the outer bowl in warm water for a minute, so it expands slightly, keep the inner bowl cool, then twist gently while lifting. If the bowls do not release, repeat the warm water step once more rather than pulling harder.
Step by step

- Empty the cabinet and sort by use. Take everything out and sort pieces into everyday, weekly, and rarely used groups. Everyday pieces earn the easiest spot at the front and at a comfortable height. Weekly pieces go behind or above them, and rarely used pieces go to the highest shelf or another cabinet entirely. This sorting step matters because a cabinet organized by frequency is disturbed far less than one organized by size alone, and less disturbance means fewer chips.
- Measure the cabinet before buying any organizer. Measure the cabinet width, depth, and the clear height between shelves, and note any hinge, pipe, or shelf lip that eats into the space. An organizer that is even slightly too wide will jam, and a riser that is too tall will waste the space above it. Write the measurements down and compare them with any organizer before you buy, rather than guessing from a photograph.
- Build short stacks instead of one tall pile. Split plates into stacks of four to six pieces rather than one pile of twelve. Short stacks are lighter to lift, easier to control, and less likely to lean. Place the largest, heaviest plates at the bottom of each stack and the smallest at the top. When you need a plate, lift the top piece straight up instead of sliding it out from the middle of a tall stack, which is how rims scrape.
- Separate rims that would rub together. Pieces chip when hard rims knock or slide against each other. A thin layer of soft cloth, paper, or a felt separator between stacked plates reduces that contact, especially for pieces with delicate or textured glazes. You do not need a separator between every single piece, but separating the pieces you reach for most often, and any pieces that already have small edge wear, makes a real difference over time.
- Use a shelf riser to create a second layer. A shelf riser, which is a small freestanding shelf that sits inside the cabinet, turns one tall space into two shorter ones. Put one stack on the riser and one stack beneath it, so neither stack grows tall enough to lean. Check that the riser is stable, that it does not wobble when you set a plate down, and that the height under it still lets you lift pieces out without tilting them against the shelf above.
- Store bowls nested with care, not force. Bowls nest well, but forcing a slightly larger bowl over a smaller one, or jamming bowls together when they are damp, can chip rims and make them stick. Nest bowls of similar size together, leave a small gap at the rim where possible, and dry bowls before nesting. If two bowls stick together, do not twist or yank them apart. Run warm water over the outer bowl and ease them apart gently once the fit loosens.
- Put everyday pieces at the front and heavy pieces low. Everyday plates and bowls belong at the front of the cabinet, at a height between your waist and your shoulders, so you can lift them without reaching or stretching. Heavy stacks belong on lower shelves, where a slip is less dangerous and less likely to damage pieces below. Rarely used serving pieces belong high up, where they are safe from daily traffic, even if they take a ladder or a step to reach.
Common mistakes to avoid
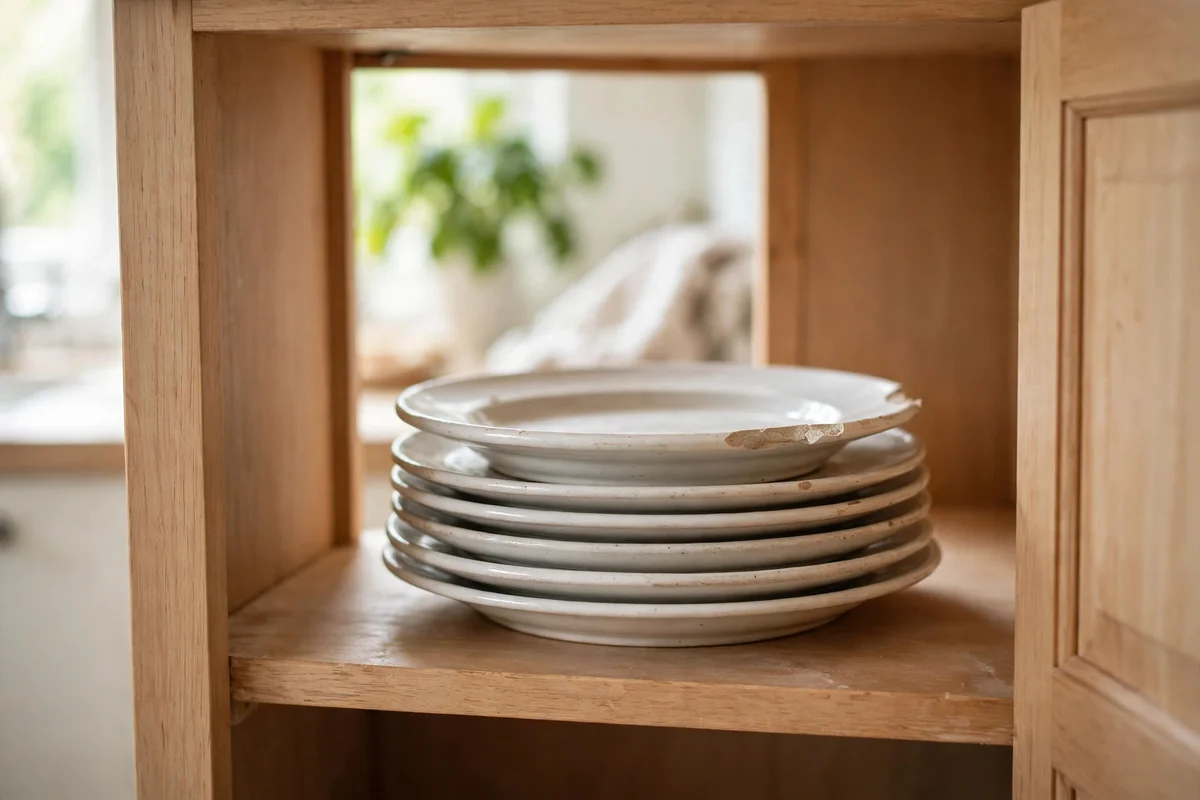
- Stacking every plate in one tall tower. Tall stacks lean, wobble, and put all the weight on the bottom piece. They also force you to slide pieces out sideways, which scrapes rims. Shorter stacks are safer and easier to use every day.
- Sliding plates out instead of lifting them. Dragging a plate across the plate below it grinds the rims together. Always lift the top piece straight up, even when you are in a hurry, because that one habit prevents most rim chips.
- Overfilling the cabinet until pieces jam. A cabinet packed so tightly that pieces wedge against the door or the shelf above will chip every time you open or close it. If you have to force the door shut, the cabinet is too full and something needs to move elsewhere.
- Nesting damp bowls tightly together. Damp bowls stick, and stuck bowls chip when forced apart. Dry bowls fully before nesting, and nest similar sizes together rather than forcing mismatched bowls into one pile.
- Putting heavy stacks on high shelves. Heavy pieces stored high are harder to lift safely and cause more damage if they slip. Keep heavy dinnerware low and light, rarely used pieces high.
- Ignoring the cabinet door swing. Pieces stored right at the door edge can be knocked when the door opens, especially in corner cabinets. Leave a small gap at the front edge so the door never brushes the stack.
What you need — and what to skip
You need a tape measure, a soft cloth or paper for separating pieces, and optionally a sturdy shelf riser and a simple plate divider or rack that fits your measured cabinet. No drilling or permanent fitting is required for most small-cabinet solutions, and the whole reorganization usually takes under an hour once the cabinet is empty.
Skip tall, unstable stacking racks that wobble, skip organizers that are wider than your measured cabinet, and skip buying a whole new set of storage products before you have sorted pieces by use. Sorting and shorter stacks alone solve most chipping problems, and organizers should fill a gap you have actually measured, not a gap you imagine.
Small-cabinet storage options compared
| Method | Best for | Space gained | Watch out for |
|---|---|---|---|
| Short stacks | Everyday plates | None, but much safer | Needs more shelf width than one tall pile |
| Shelf riser | Tall cabinets with wasted height | A full second layer | Must be stable and correctly sized |
| Plate divider or rack | Plates stored upright | Easy access to single plates | Needs depth for plates to stand |
| Separators between pieces | Delicate or textured glazes | None, but protects rims | Adds a small step when stacking |
When to stop
Stop reorganizing when every everyday piece lifts straight out without moving another piece, no stack leans or wobbles, the cabinet door closes without touching anything, and heavy pieces sit low. If you still have to force pieces in, move rarely used items to another spot rather than squeezing them into an already full cabinet.
Related on Kitchenlify
- Dinnerware & Serveware
- How to Clean and Care for Stoneware Dinnerware
- How to Organize a Pantry With Storage Containers
- All guides
Frequently asked questions
How do I stop plates from chipping in the cabinet?
Keep stacks short, lift plates straight up instead of sliding them out, and separate rims that would rub together with a soft layer between pieces. Most chips come from daily sliding and leaning, not from single accidents, so those habits matter more than any single product.
How high should I stack dinner plates?
Four to six plates per stack is a practical limit for everyday use. Taller stacks grow heavy, lean more easily, and force you to slide pieces out sideways, which scrapes rims and increases chipping.
Should I store plates upright or stacked flat?
Both work if done well. Flat stacks suit most cabinets, while upright plate racks make it easy to pull out a single plate without disturbing others. Upright storage needs enough cabinet depth for plates to stand securely without leaning on the door.
Can I nest bowls without chipping them?
Yes, if you nest similar sizes together, dry them first, and never force a tight fit. If bowls stick, run warm water over the outer bowl and ease them apart gently instead of twisting or pulling hard.
What is the best way to use a small cabinet for dinnerware?
Sort by how often you use each piece, put everyday pieces at the front at a comfortable height, use a shelf riser to split tall spaces into two layers, and keep stacks short and heavy pieces low. Move rarely used serving pieces elsewhere rather than overfilling the cabinet.
Should I dry dinnerware before putting it in the cabinet?
Yes, dry every piece fully before stacking or nesting it. Damp bowls stick together, and stuck bowls chip when they are forced apart. Dry plates and bowls also stack more steadily, because wet pieces are more likely to slide against each other when you lift them out.
Where should heavy dinnerware go in a small cabinet?
Put heavy stacks on lower shelves, where a slip is less dangerous and less likely to damage pieces below. Keep everyday pieces at the front, at a height between your waist and your shoulders, so you can lift them without reaching or stretching. Put light, rarely used pieces high up, where they are safe from daily traffic.
How much space should I leave at the front of the cabinet?
Leave a small gap at the front edge so the cabinet door never brushes the stack. Pieces stored right at the door edge can be knocked when the door opens, especially in corner cabinets. If you have to force the door shut, the cabinet is too full and something needs to move elsewhere.
Can I store different sizes of plates in one stack?
Yes, if you keep the stack short and in size order, with the largest, heaviest plates at the bottom and the smallest at the top. Do not build one tall mixed stack, because tall stacks lean, grow heavy, and force you to slide pieces out sideways, which scrapes rims. For shallow shelves, one size per short stack is the simplest safe layout.
How do I store mugs and glasses in a small cabinet?
Stand mugs upright in a single layer, never stacked, with a small gap between them, and hang them from hooks under a shelf if the cabinet is short. Store glasses upright too, never nested, and keep the tallest glasses at the back, because a glass knocked over inside a cabinet breaks the glass next to it.
What about open shelves for dinnerware?
Open shelves work if you keep only daily plates and bowls on them, in short stacks of 4 to 6, with the most-used pieces on top. Dust them weekly, because open shelves collect dust and cooking grease, and keep anything fragile or rarely used in a closed cabinet, because open shelves are for what you reach for every day.
How do I pack dinnerware for moving?
Wrap each plate and bowl in packing paper, stand plates on their edges in a small box, not flat in a tall stack, and fill every gap with crumpled paper so nothing moves. Label the box fragile and this side up, and do not stack heavy boxes on top of a dinnerware box, because the weight cracks the bottom plates.